Film FX Part 3: Frames
Introduction
Over the past few weeks we have introduced the Film FX categories Light, Texture, and Distressed. This week, we wrap up this work with the Frames category, with options for both photo and video to add film frames to your work.
What is the Frames Category?
 35mm 7a, KP6
As we learned in Part 1, film can be thought of as layers of silver halide suspended in gelatin. Unused film doesn’t have frames, it’s similar to a roll of blank paper. The only distinct feature it does have are holes on the sides that allow the cameras to pull the film through the camera, known as “sprocket holes”. However, when light shines through a lens and exposes the film, a rectangular image is created on the film once it’s developed. The “frame” then is the parts of the film around the image that were not exposed light.
First, let’s look at the sprocket holes. These rounded rectangles perfectly align with the gears in cameras that allow the film to be pulled through for successive images to be made. This is simple enough, but you may notice some variation in these holes as you look through Frames category, and this begins our look at the variations in the size of video film.
 Motion Film Formats
As you can see above, there are several formats of video film (and this is actually greatly simplified from the full story). In general, the larger formats have better image quality, but cost more to use, while the smaller formats are cheaper but capture less detail and show more grain. If you imagine the film being pulled vertically across a horizontal image coming out the back of the lens, you can see how you’d wind up with horizontal images with holes on the sides. When overscanned to include the frame and sprockets, Super 8 has one sprocket, 8mm has 2, super 16 has 2 on the left, 16mm has 2 on each side, and 35mm has 4 on each side.
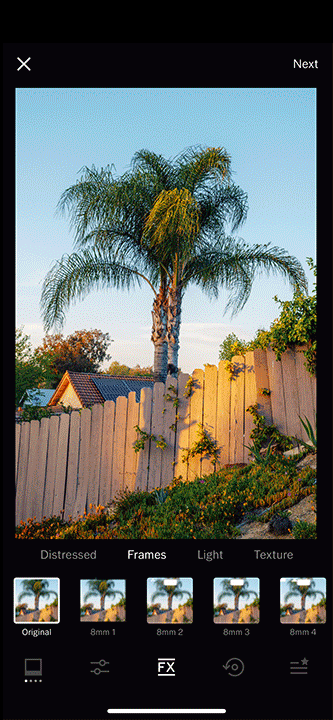
In the Frames category, the options are all labeled according to their format - 8mm, 16mm, and 35mm. In the video editor, this is all fairly straightforward, but in the photo editor, things get a little more complicated.
 35mm 5a, KT32
In photo film, 35mm is also the dominant format thanks mostly to Leica, but the film is pulled across the lens horizontally rather than vertically, creating larger horizontal images with sprockets on the top and bottom instead of the sides like with video film. However photographers have always been known to take vertical images, and the result then is that the sprocket holes do wind up on the sides since everything is turned sideways. Thus, the photo editor needs several additional options to account for photo film. The 8mm and 16mm options remain, since a still image taken from motion film is certainly physically possible (though more difficult and costly), but the 35mm options are where the divergence begins. 35mm 1-6 are all built from photo film with the sprocket holes on the top and bottom of a horizontal image. 35mm 7 and 8 are built from video film and thus have the sprocket holes on the sides of a horizontal image. Like the Distressed category from Part 2, we’ve included an a and b version to give creators better control of the cropping of their film frame. With that, we’re nearly done talking about film formats, but we now need to turn back to the video side to address one more complication: vertical video.
When applying these film scans to modern videos, vertical video presents an interesting challenge. Historically, all video was horizontal, hence all motion film and cameras were made for horizontal capture and projection. Only in the cellphone era has vertical video become popular, so the question of how to apply horizontal film frames to vertical videos came up quickly.
 Left: Stretched 8mm Frame, Right: Rotated 8mm Frame
As you can see above, stretching the film scans to fit vertically created very unsightly results, and the truth is that the only real way to create a real film frame that is vertical would be to turn a video camera sideways. Hence, we opted to rotate video film scans to align to vertical videos, resulting in sprocket holes on the top and/or bottom, just like how they’d be if you turned a movie camera sideways.
Speaking of stretching, varying aspect ratios presented another challenge. Movie film captures a range of aspect ratios that are generally quite wide. Modern 16x9 videos fit pretty nicely into most film frames. However, most stil film cameras capture a 2x3 image, while modern cameras allow users to capture a wide range of ratios, from a 1x1 square to a wide 16x9 rectangle. Apple’s cameras in particular stick closely to the 4:3 format, which is a bit taller than 2x3 film images. Some of the frames with fewer details can be stretched gracefully to accommodate any aspect ratio, but many cannot. For this reason, some of the 8mm frames, the 16mm frame, and all of the a versions of the 35mm frames will crop an incoming image to fit into the film scan’s image area. The b versions of the 35mm frames will stretch to fit the incoming image’s aspect ratio.
 8mm 3, KA1, Vignette Tool
With film formats finally out of the way, there’s still the mystery of why some frames and sprocket holes are white while others are black. The answer lies in the nature of scanners and the two main types of film: positive and negative.
Negative film captures a reverse image of the scene. So, a bright part of the scene results in a dark part of the film, and visa versa. Since the borders receive no light, those silver halide crystals are washed away in development, resulting in a clear border. When this is scanned, a white light is shone through the film onto a digital sensor. Since the frame is clear, the light goes right through it, creating a white frame. But remember, this is a negative image, so it still needs to be reversed to look realistic. When this is done, our white border becomes black, and hence most of our frames are black.
 35mm 8a
However, there is also positive film. In photography, there are positive films that can be used like Fuji Velvia or Kodak Ektachrome. These produce a realistic “positive” image, and they also have dark frames for the same essential reason as negative film. In video however, the final “positive” that gets projected for an audience is the result of shining light through a developed negative onto an undeveloped print film. The print film itself is negative, but it has a clear base. Since a negative plus a negative = a positive, the result is a positive image. When print film is scanned, it does not need to be reversed and thus any lighting shining through it will remain white. This is how white sprocket holes can wind up on a film scan, and this is seen in many of the 8mm options, as well as the very last 35mm option, as these are all built from print film.
 35mm 1a, KG2
Lastly, you may notice that some of the photo films include cryptic numbers and symbols in the frame - even something that looks like bar codes. The numbers are typically to denote the frame number and the type of film. Frame numbers are smaller, within the range of 1-36. Film numbers are usually based on their ISO and are thus larger and often in squared multiples of 100, such as 100, 200, 400, 800, 1600, 3200, etc. The bar codes are used by scanners to identify the type of film and apply the correct adjustments to create a pleasing image.
Using Frames Effects
 8mm 7a, FS1
More than any other category, Frames draw very directly upon our visual history with film. Applying these to an image or video imports our associations with film images, giving them a sense of nostalgia or an anchor in the past. All of the video frames include texture elements as well to create a realistic effect, and all of the same concepts from the Texture section apply here too. The photo-specific frames (35mm 1-6) are unique in that they are only frames, so you’ll need to use the Grain tool to add texture if you want it with those.
You’ll notice that there is no strength control for frames, as it’s not conceivable that you could ever have a partial film frame. For this reason, these are simply on/off.
 35mm 6a, KX4
For both photo and video, be careful when creating black and white outputs. A black and white film would only have black and white in its frame, so be sure to only use frames without color for this. In the photo editor, 35mm 4-6 are built from black and white film, so these are great fits for black and white images. In the video editor, 8mm 2-5 and 16mm 2 have color elements in them and are best used for color videos. 8mm 1, 16mm 1, and 35mm 1-2 would work great for black and white.
Lastly there is perhaps one non-nostalgic use for these frames: If you have an image or video with a large section of white at the edges (say a blown out white sky), the edges of the image may disappear when published against a white background (like when publishing to VSCO). Putting a frame on an image like this can help to define its edges and prevent it from being indistinguishable from the background in sections.
Wrapping up
 16mm 1, KE1
While we certainly intend to continue to expand the capabilities of the FX tab, this at last marks the end of what we have to talk about for now. It’s been tremendously fun to create this product, and we hope you’ll try it out! You can try Frames yourself with a VSCO Membership, or a free 7 day trial.
If you decide you want to share the images on VSCO, Instagram, or other social channels, use #VSCOFX so we can see what you create.
We also invite you to come and discuss the new FX, or any VSCO feature or topic in our official VSCO Discord Channel
All images by Zach Hodges


